
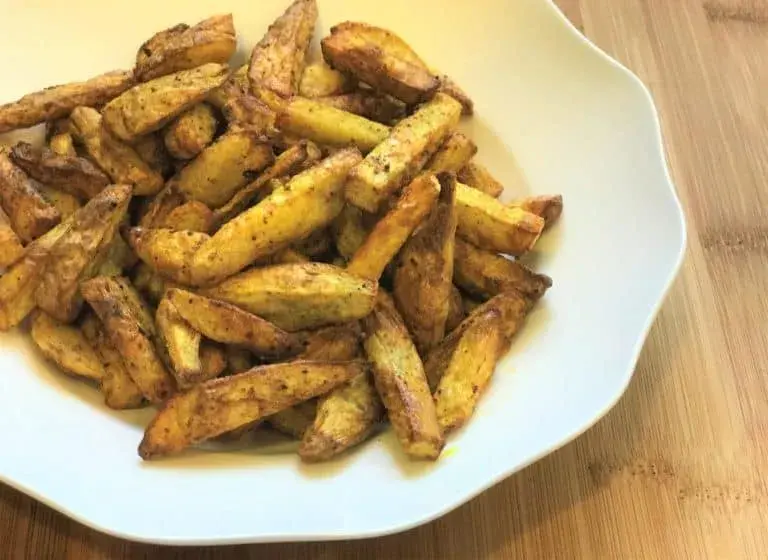
Taro Fries
Abuja, Nigeria · View all recipes
Overview
Taro root cut into batons, seasoned and baked or fried until the outside crisps. No country is claimed, and none is implied by the recipe, which is a modern snack rather than a traditional dish. Taro is worth knowing about, because it is not a novelty ingredient anywhere except in Western supermarkets. It is one of the oldest cultivated plants in the world, and across West and Central Africa it is a staple under the name cocoyam, the corm cooked and pounded, or worked into soups, and the leaves eaten as a vegetable. Nigerian ekpang nkwukwo and Ghanaian kontomire both belong to that tradition and are on this site. So while taro fries as a format are a contemporary invention, the vegetable itself is thoroughly African as well as Asian and Pacific. What makes it behave differently from potato in the pan is starch. Taro is denser and starchier than potato, with a mild nuttiness and a faint natural sweetness, which is why it crisps well and why the soaking step in the method is worth doing rather than skipping. The source's nutritional comparisons with potato have not been carried across. The relevant point for cooking is texture, and that is covered in the tips.
Ingredients
Dietary tags are provided by contributors as a guide, not verified by AFN, and they depend on the products you buy. If you have a serious allergy, check every ingredient yourself. Cooking, allergies and your own judgement
Directions
- 1
Wash and peel the taro roots with a vegetable peeler. Some people find raw taro irritating to the skin, so wear gloves if you are sensitive to it.
- 2
Cut the peeled roots into evenly sized batons or wedges.
- 3Optional but worthwhile
soak the cut taro in cold water for about 30 minutes to draw out surface starch, then drain and dry thoroughly. This is what makes them crisp.
- 4
Set the oven to 425°F / 220°C with a baking tray inside, so the tray is hot when the taro goes on.
- 5
Toss the taro in a large bowl with the oil until evenly coated.
- 6
Season with salt, pepper and any spices you are using, and toss again to distribute them.
- 7
Spread the taro in a single layer on the hot tray, leaving space between the pieces.
- 8
Bake for about 20 to 25 minutes, turning them once halfway, until golden and crisp outside.
- 9
Let them cool for a couple of minutes before serving.
- 10
To deep-fry instead, work in batches in hot oil for 3 to 5 minutes per batch, until golden, and drain on kitchen paper.
Africook’s Notes
 Personal notes from Deborah Olayiwola
- Soak and then dry them properly. Surface starch is what makes taro fries gummy rather than crisp, and a wet surface stops them browning.
- Get the tray hot before the taro goes on. A cold tray means the underside steams while the top roasts.
- Give them space. Crowded pieces trap steam between them and go soft.
- Taro is denser than potato, so cut the batons a little thinner than you would for chips and expect a slightly longer cook.
- Raw taro can irritate the skin. Gloves solve it, and cooking destroys the compound responsible entirely.
- Never eat taro raw. It contains calcium oxalate crystals that cause severe mouth and throat irritation, and cooking is what makes it safe.
Questions cooks ask
What is taro?
A starchy tuber, one of the oldest cultivated food plants in the world, grown across Asia, the Pacific and Africa. In West and Central Africa it is known as cocoyam and is a genuine staple, the corm boiled or pounded, the leaves cooked as greens. Nigerian ekpang nkwukwo and Ghanaian kontomire stew, both on this site, are built on it. It is dense, mildly nutty and faintly sweet, and noticeably starchier than potato.
How is taro different from potato?
It is denser, starchier and lower in moisture, with a mild nutty sweetness where potato is fairly neutral. That density is exactly why it suits frying and roasting: it holds its shape and crisps well rather than collapsing. It also means it takes slightly longer to cook through than potato of the same size, so cut the pieces a little thinner and check before assuming they are done.
Can taro be eaten raw?
No. Raw taro contains calcium oxalate crystals which cause severe irritation of the mouth, throat and skin, and it must be cooked thoroughly before eating. This is not a marginal caution, it is why every traditional preparation of taro anywhere in the world involves cooking. Handling the raw peeled root can also irritate the skin, so gloves are worth using. Cooking destroys the compound completely.
Is this an African dish?
Taro fries as a format are a modern snack with no country attached, so the page sits in Worldwide Recipes under Global, with its URL unchanged. The ingredient is another matter entirely: taro is cocoyam, a genuine West and Central African staple with a deep culinary tradition behind it. If you want the African dishes built on it, look at ekpang nkwukwo, kontomire stew or cocoyam porridge rather than at fries.
Reviews
Be the first to rate this recipe
Cooked it? Your rating helps the next person decide whether to try it.
No reviews on this one yet. If you have cooked it, yours would be the first.